watonomous.github.io
[ Software Division : Ego Localization Autoware - Deprecated ]
Created by [ Tony Jung], last modified on Apr 26, 2021
Autoware
We will be using the Autoware's implementation of a point-cloud matching based localization algorithm. They use a normal distribution transform algorithm to match the point-clouds to an existing point-cloud map.
NOTE: This requires a GUI component so run this in gui_tools image. This is just to run it and get an idea of what we're trying to do. We will eventually use this in our stack and no longer require this to be installed on gui_tools.
No longer in use.
Installation
Follow the installation steps from the Autoware repo: https://github.com/Autoware-AI/autoware.ai/wiki/Source-Build
Running Autoware Modules
Localization with Autoware Demo Rosbag
Following the steps of https://gitlab.com/autowarefoundation/autoware.ai/autoware/-/wikis/ROSBAG-Demo but in more detail and with slightly different steps.
-
Download the demo data from autoware:
-
wget https://autoware-ai.s3.us-east-2.amazonaws.com/sample_moriyama_data.tar.gz
wget https://autoware-ai.s3.us-east-2.amazonaws.com/sample_moriyama_150324.tar.gz
tar zxfv sample_moriyama_150324.tar.gz
tar zxfv sample_moriyama_data.tar.gz
-
-
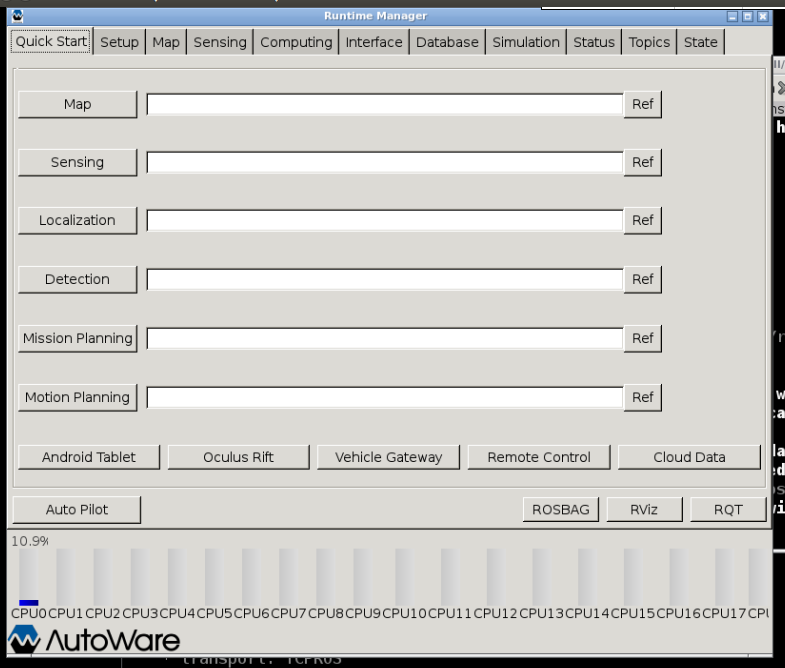
Launch the autoware runtime manager
-
cd autoware.ai
source install/setup.bash
roslaunch runtime_manager runtime_manager.launch
TROUBLESHOOTING: The roslaunch command might not work. It might immediately crash. If that happens try running "rosrun runtime_manager runtime_manager_dialog.py" instead
The runtime manager will look something like this:
[
-
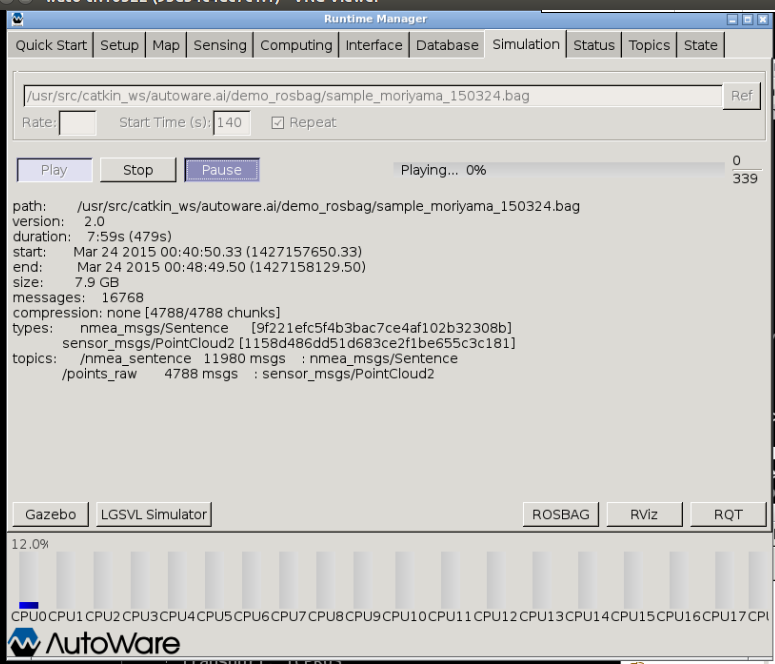
- Load the rosbag
- A lot of the autoware functions running with the runtime manager rely on the /clock messages from the rosbag, so you need to load the rosbag first
- Go to the "Simulation" tab
- Click the "Ref" button and select the rosbag you downloaded earlier
- Set the "Start time (s)" to 140
- (optional) click the repeat box
- Press the "Play" button
- As soon as it becomes available, press the "Pause" button
- Your runtime manager should look something like this:
- [
- [
- Open RViz
- Click the "RViz" button near the bottom right of the runtime manager
- Go to "File"→"Open Config" and open up the rviz config file autoware.ai/src/autoware/documentation/autoware_quickstart_examples/launch/rosbag_demo/default.rviz
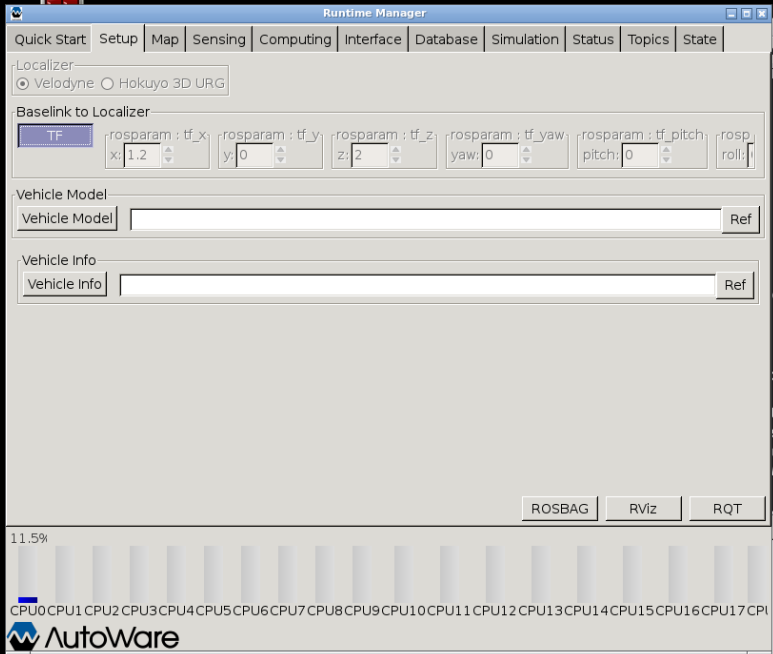
- Turn on velodyne tf
- Go to the "Setup" tab
- Leave everything as the default values and make sure "Velodyne" is selected in the Localizer box
- Click the "TF" button
- The runtime manager should look something like this:
- [
- [
- (Optional) Load vehicle model
- Go to the "Setup" tab
- Click the "Vehicle Model" button. The empty reference loads the default model
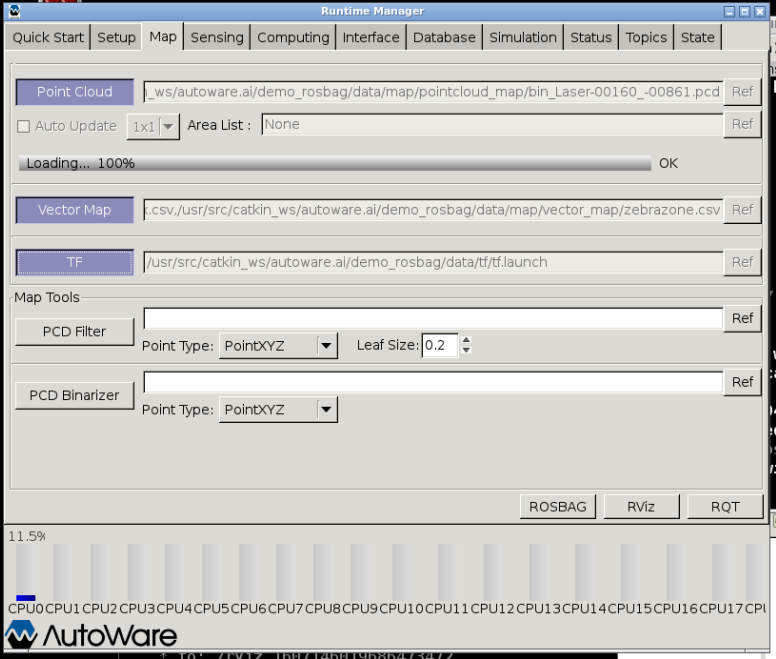
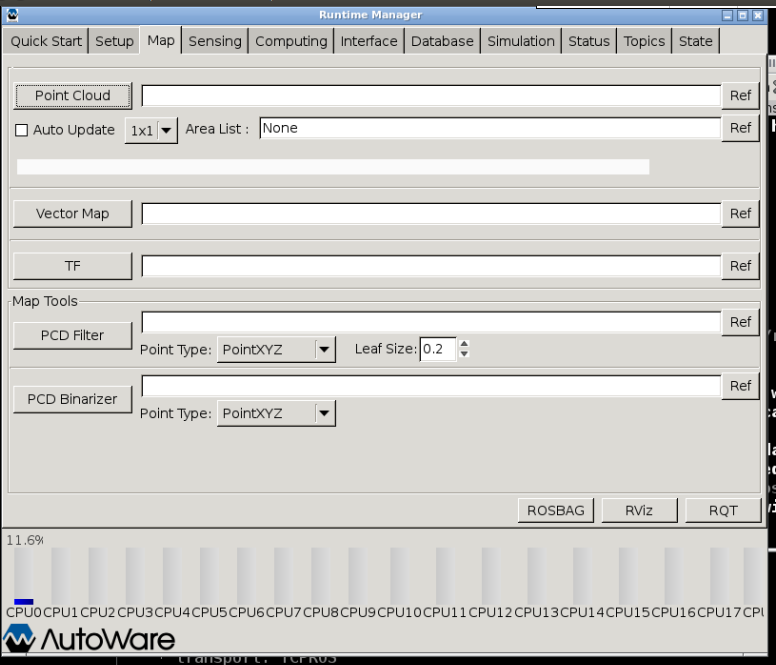
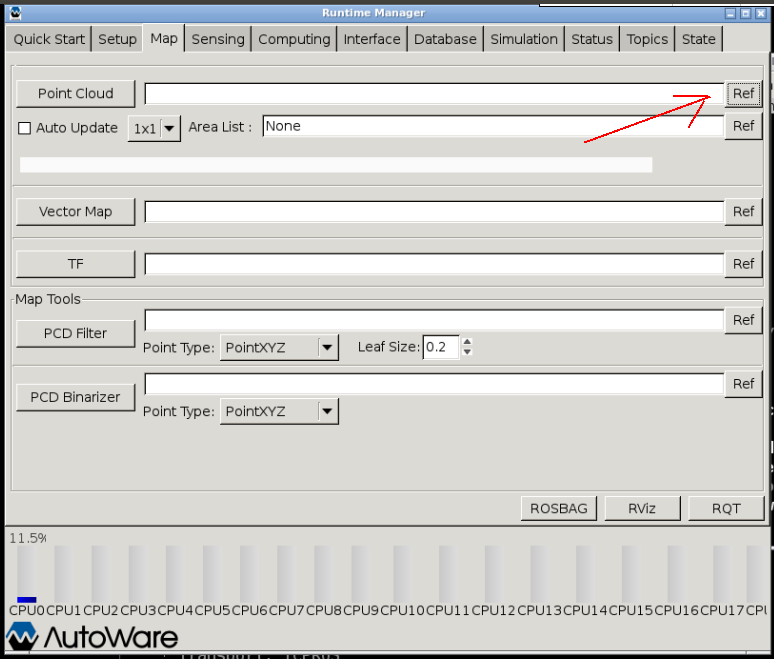
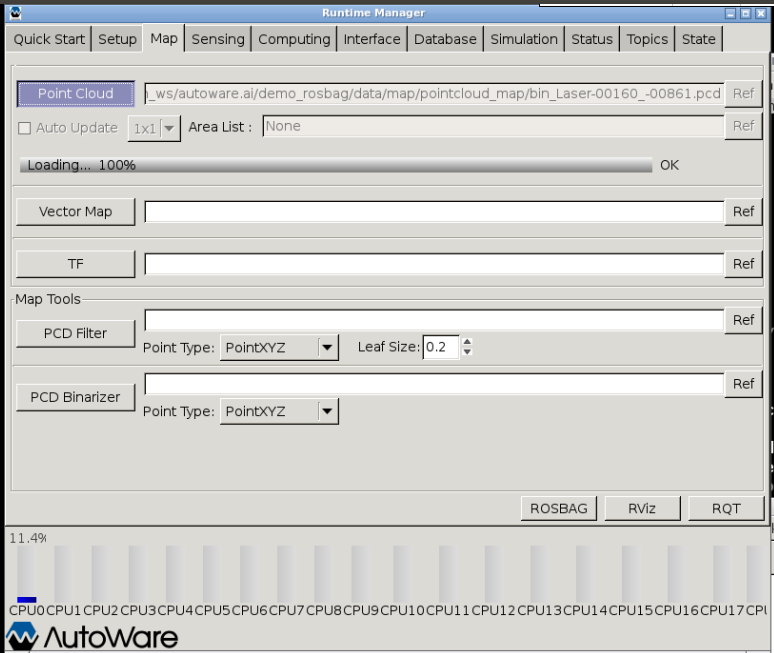
- Load the map data
- Go to the "Map" tab
- Click the "Ref" button on the right side of the "Point Cloud" row
- Go to where you downloaded the map data from step 1 and select all or some of the .pcd files. The .pcd files are in the folder data/map/pointcloud_map/
- Click the "Point Cloud" button
- Click the "Ref" button on the right side of the "TF" row
- Go to where you downloaded the map data from step 1 and select data/tf/tf.launch
- Click the "TF" button
- (steps h to j are optional) Click the "Ref" button on the right side of the "Vector Map" row
- Go to where you downloaded the map data from step 1 and select all or some of the .csv files. The .csv files are in the folder data/map/vector_map/
- Click the "Vector Map" button
- The runtime manager should look something like this:
- [
- [
- Turn on the points downsampler
- There are too many points from the point cloud messages, so to increase computational speed we downsample them
- Go to the "Sensing" tab
- Any of the Points Downsampler should work but I've only used
the voxel_grid_filter so no promises on the other
ones
 {.emoticon
.emoticon-cheeky}
{.emoticon
.emoticon-cheeky}
- [
- [
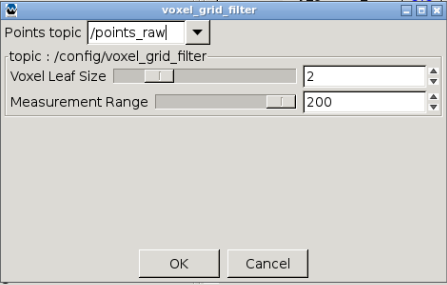
- Click the "app" link next to the voxel_grid_filter (or whichever downsampler of your choosing)
- Set the "Points topic" to /points_raw and leave the rest as
the default values
- [
- [
- Click "OK" which will close this window
- Back at the main runtime manager, click the check box next to "voxel_grid_filter" on
- Turn on gnss localizer (This is only used to get the initial
position. The actual localization algorithm does not use the gnss
but still requires this to run properly)
- Go to the "Computing" tab
- Click the check box next to "nmea2tfpose"
- Turn the localization module on
- Go to the "Computing" tab
- The default setting for the localization module is fine so no need to change any settings
- Click the check box next to "ndt_matching"
- Run the rosbag
- Back in the autoware runtime manager, go to the "Simulation" tab
- Click the "Pause" button to un-pause
- By now your RViz should look something like this:
- [
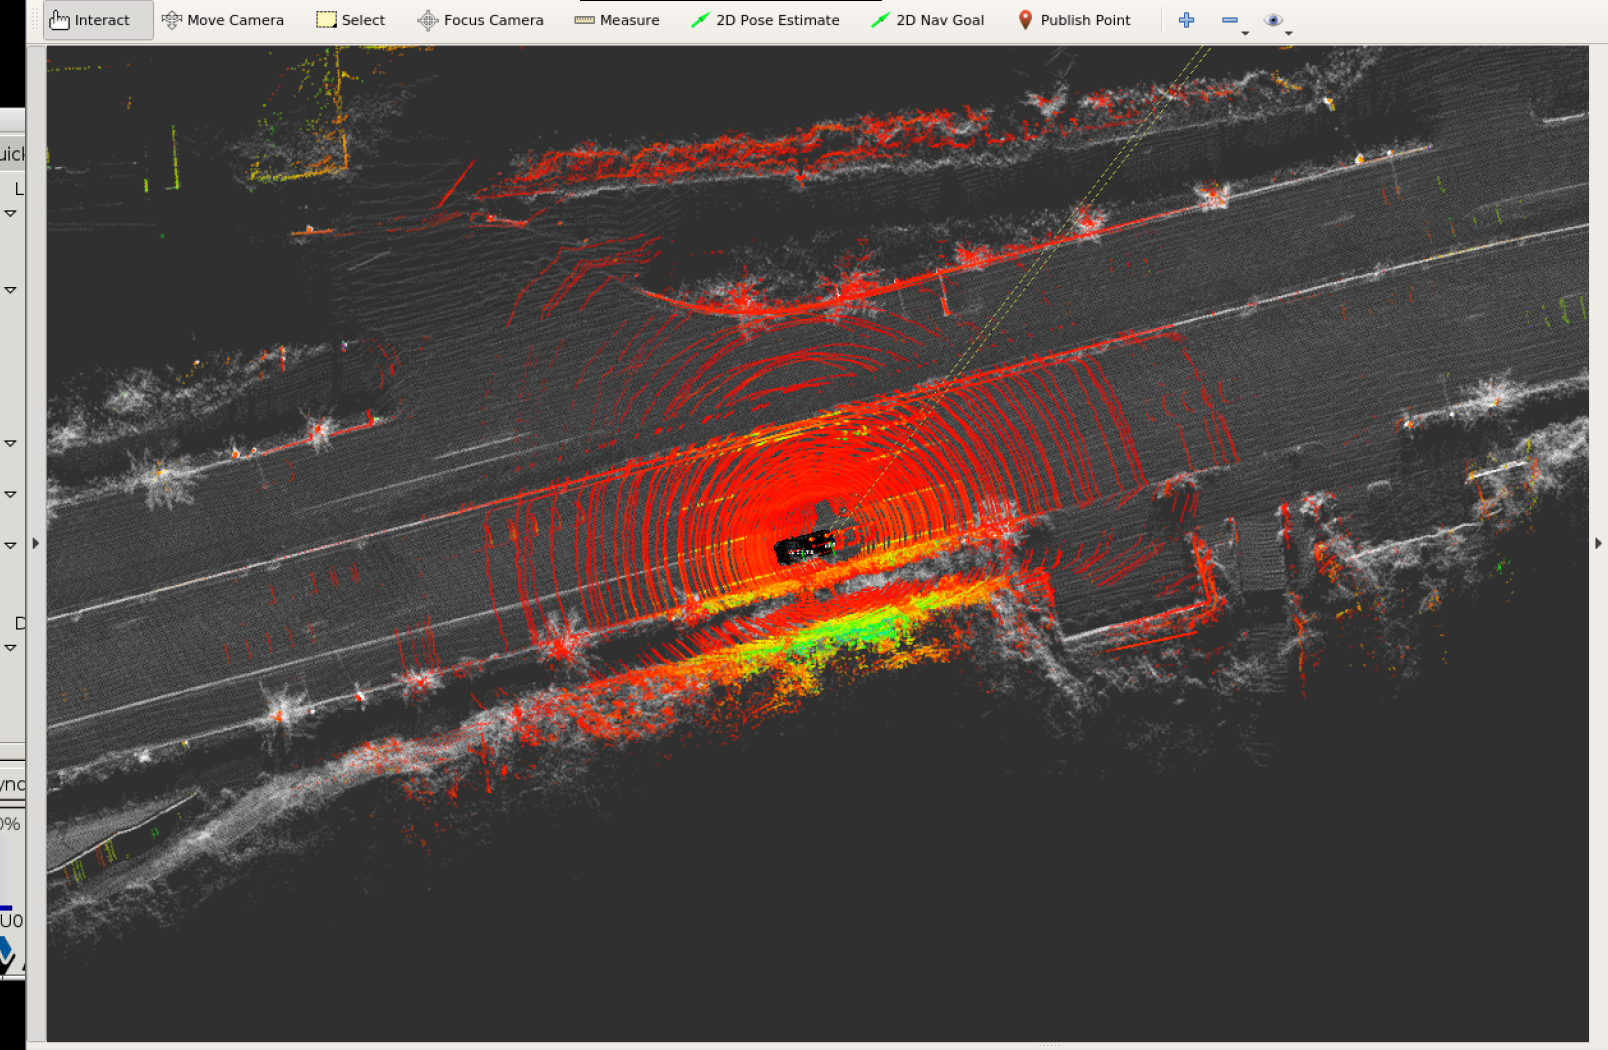
- The white points are the pointcloud map and the coloured points are the live points we get from the lidar/rosbag
- Check that the car/view is moving along the map
- [
Attachments:
![]() image2020-12-5_0-45-19.png
(image/png)
image2020-12-5_0-45-19.png
(image/png)
![]() image2020-12-5_1-4-4.png
(image/png)
image2020-12-5_1-4-4.png
(image/png)
![]() Screenshot from
2020-12-05 01-00-35.png (image/png)
Screenshot from
2020-12-05 01-00-35.png (image/png)
![]() image2020-12-5_1-36-27.png
(image/png)
image2020-12-5_1-36-27.png
(image/png)
![]() image2020-12-5_1-39-0.png
(image/png)
image2020-12-5_1-39-0.png
(image/png)
![]() image2020-12-5_1-57-33.png
(image/png)
image2020-12-5_1-57-33.png
(image/png)
![]() image2020-12-5_1-58-51.png
(image/png)
image2020-12-5_1-58-51.png
(image/png)
![]() downsample.png (image/png)
downsample.png (image/png)
![]() image2020-12-5_2-5-16.png
(image/png)
image2020-12-5_2-5-16.png
(image/png)
![]() image2021-1-10_3-31-9.png
(image/png)\
image2021-1-10_3-31-9.png
(image/png)\
Document generated by Confluence on Dec 10, 2021 04:01